Freelancers face a variety of challenges, especially those in the creative fields, who may find it more difficult to value and price their work. Web designers, developers, and digital entrepreneurs of all kinds have almost unlimited opportunities to share their talent with a growing customer base. While this is a great thing, it’s only promising if they can also find efficient and effective ways to collect on that business, and ensure a steady flow of promptly-paying customers.
One essential tool that can be the key to managing your very unpredictable money situation is a professional invoice. A staggering 71 percent of freelancers report having difficulty getting paid at some point in their career, with 81 percent of those complaints coming specifically from late payments. Having a properly executed and easy-to-use invoicing system can greatly reduce these non-payment issues.
A staggering 71 percent of freelancers report having difficulty getting paid at some point in their career.
Invoices are also a lifesaving tool in the case of a rare, but panic-inducing, tax audit. Tax errors can be costly, especially if your invoice isn’t clear on each line item of services provided and expenses incurred. Failing to provide proper detail can leave you in the lurch with your federal taxation agency. If the time comes, and you have to turn over all your financial documentation, a properly done invoice will answer many questions for authorities and help prove you’re running a legitimate freelance operation.
Perhaps the best benefit of a well-made invoice is the organization and freedom. Piles of documentation, email chains, and phone calls can be summarized with a basic invoice. It cuts down on clutter, and gives you more time to create and earn (instead of hunting for lost paperwork).
Let’s look at the basic requirements to creating an invoice that works. We’ve analyzed thousands of freelance invoices on Bonsai and have come up with tips to help you get paid faster, while building a healthier business.
You might also like: 5 Tools for Headache-Free Freelancer Invoicing.
1. Reference section
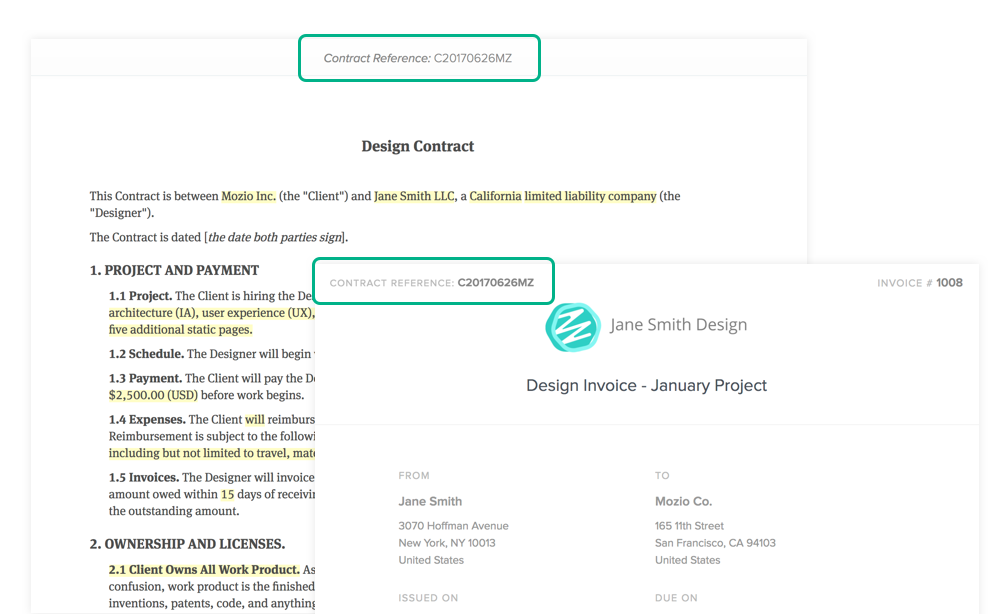
First and foremost, use this portion of the invoice to call out any previous contracts, proposals, or purchase orders. If you’ve agreed to terms that are outside the norm for your services or rates, make note of them here.
This will help in the case of a legal issue down the road, and you’ll love how it keeps your own bookkeeping up-to-date. One other bonus is the happy client; more info is always appreciated by their accounting teams.

It’s also recommended that you generate a reference number or code for every invoice you send out. This can be done by most popular bookkeeping programs. You can also choose to assign one yourself.
Pro tip: Use a reference system to follow, like “AAAAMMDD-Client Initial”, which helps when trying to order files in folders.
The reference section is also where you will include dates. Perhaps one of the most important details of any invoice, you’ll want to document both the date you created the invoice (usually very close to when the work was completed), and the date the remittance is due (also called the “due date.”) You’ll want to refer to your client contract to make sure the date you mark as “due”, matches when they agreed to pay.
Pro tip: Don’t forget to include a specified payment timeline in your contract. Most industry professionals agree that 30 days is a standard due date, but be prepared to wait longer if it wasn’t agreed to beforehand.
2. Professional header
This is where you can let your branding really shine! A professional invoice usually includes your logo or banner, along with the following:
- Company name
- Address
- Contact information
- Legal entity number
Note that the legal entity number is usually an EIN or SSN for freelancers located in the U.S. Check with your client to see what they need for remittance. Some countries, such as France, require this information on all invoices.
Pro tip: Don’t have a code yet? “Company currently in the incorporation process” can be put in this field, in the meantime.
The professional header is vital for resolving any accounting or payment problems in a timely manner. With all the info at their fingertips, your client’s accounting team can reach out directly, and you’ll avoid tedious back and forth. It’s also vital legal compliance for your client.

Pro tip: Don’t use excessive branding and customization. You’ve already convinced your client and you’re trying to get paid faster, so make the work easier for the accounting team by focusing on key information.
Find your new favorite Markdown editor in our roundup.
3. Client information
All invoices should be uniquely tailored to the client you’re working with. Required fields of the client section of the invoice should include:
- Contact name
- Company name
- Address
- Contact information
Why would your client need this info about themselves? It’s actually very common for accounting teams to need reminding of the contact who approved the invoice. It also keeps their accounting departments in legal compliance.
Pro tip: With any new deal, be sure you ask who the invoice contact will be up front. It will make filling out the invoice info much easier later.
4. Invoice details
This is the most important part of the invoice. It includes the following:
- Services rendered
- Cost per service or project
- Quantity of each
- Total cost per service or project
- Total due
- Discounts (if any)

Freelancers often make mistakes when filling out this portion of the invoice. These common errors include getting too granular, which results in providing far too much detail on how you calculate your rates and pricing. Remember that, if your rates were not agreed on earlier, your clients may read into your invoice too much, and possibly try to negotiate or question your rates.
Pro tip: Avoid haggling after the fact by listing a simple description of services (“front page logo design,” for example) with the total rate.
You should also avoid the temptation to include unexplained fees. These can include the cost to use a software you’re charging for, or even some administrative fees. Avoid guesswork or doubt by creating an appendix detailing the nature of those fees.
You should also avoid the temptation to include unexplained fees.
When it comes to discounts, there are numerous best practices that can help you look professional — and get you paid. One of them is to attach the discount to individual items, rather than the total invoice. Not only does this make the discount appear higher in relation to the total due, but you will avoid sending the message that future invoices will also be discounted.
Pro tip: Use discounts for items you rarely provide. If you rarely do workshops, for example, give a discount on these rather than consulting. This helps you avoid setting the expectation that you will discount future consulting fees — the bread and butter of your work!
Finally, it’s very important to use deliverable names for item descriptions. This puts a proper price on tangible things and will help clients value your work. You might, for example, try charging for “Shopify new customer support app integration” v.s. “Development hours.”
You might also like: 7 Tactics for Handling Late and Non-Payment.
5. Special remittance instructions
Great invoices include a line or two that are specific to the contract, and regard payment terms. This may include:
- Special remittance instructions
- Payment types accepted
- Link to make payment online
- “Check payable to” preferences

With all the available payment methods and services out there, giving your client clear choices that are spelled out specifically, will make remittance easy. It’s also important that you have agreed with the customer on payment amount, due date, and terms in advance of sending the invoice. A contract or detailed email should provide this agreement, and would avoid any bad surprises for your client.
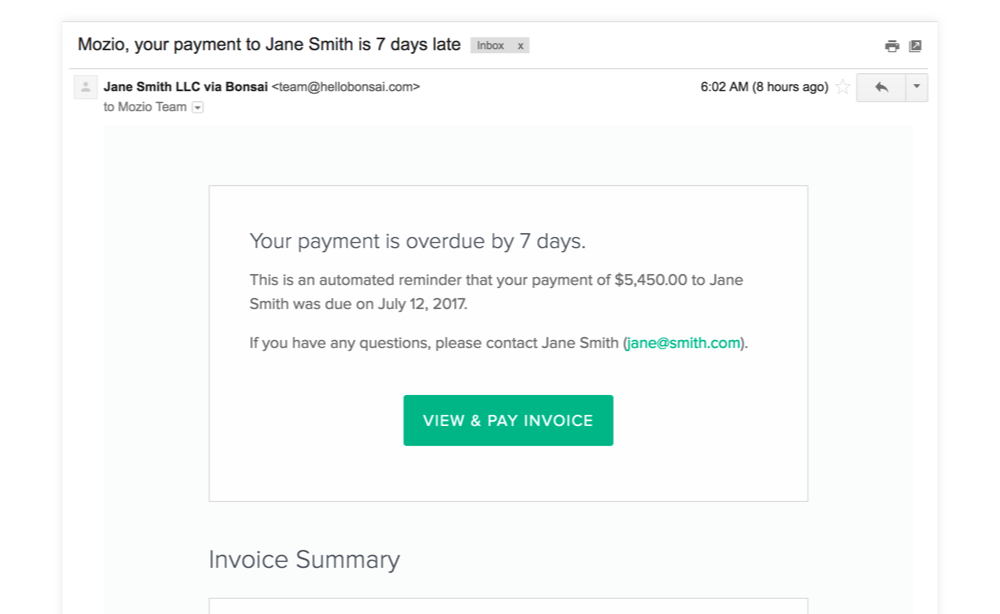
Pro tip: Develop a follow-up plan for late payments. Send a reminder a week or 10 days after the due date, then every week or so after that.

What if the client still doesn’t pay? It’s possible that you can charge a late fee, but only if one has previously been agreed on. This should be upfront and clearly spelled out in any contract language, usually before work was started on any project.
“The Designer will invoice the client for work done at the end of the project. The client agrees to pay the amount owed within 15 days of receiving the invoice. Payment after that date will incur a late fee of 5.0% per month on the outstanding amount.”
This is an example of late fee clause included in a contract.
Pro tip: Try alternative methods of reaching the client for late payments. Phone, postal mail, and even social media (such as Twitter) can be used. Just be professional, and don’t air dirty laundry online! (A simple “please contact me at your earliest convenience” should suffice.)
Create great invoices
Invoices are often credited as the number one business tool in a freelancer’s toolkit. Without them, you likely won’t get paid, so it’s important to get them right.
Fortunately, technology has made creating, sending, and collecting on invoices a simple process. Once you have put together your first, great invoice, it’s easy to duplicate and customize for all future work. This will leave you with more time to do what you do best — which is to create!
Read more
- Top Freelance Resources on the Shopify Web Design and Development Blog
- Go Back to School With These Online Courses for Continuous Learning
- 10 Apps to Boost Your Content Marketing Efforts
- Teaching Code: A Getting Started Guide
- 5 Ways to Ensure Your Client's Online Business is Tax Compliant
- How to build a Shopify POS Pro demo store
- Product Management Basics: Identifying Customer Pain Points and Validating Ideas
What do you include in your freelance invoices? Tell us in the comments section below!

