Let’s say you’ve got a client, and said client is a boutique owner. Arguably, the most powerful asset in their arsenal is their ability to showcase the brands that they have partnered with to sell.
Enter the brands page: A quick, visually exciting way for customers to find new collections and brands that they know and trust. Pages like this are important because there is both brand recognition and a sense of trust. Your client's brand has proven to be established/trusted enough for other brands to want to be showcased.
If you're launching a brand, be sure to check out our article on how to have a successful brand launch. Or, learn more about how to build an impactful landing page for your Shopify clients.

Now you come to realize that there is not a great way to showcase collections-within-collections so (being the problem solver that you are) you turn to the good old www.myshopify.com/collections/all.

However, a problem arises. Now every collection you’ve ever created is here. So you get bags and blazers, as well as the trends/brands you want to showcase. So you do what any programmer/designer does — you try and jimmyrig it.
You jump into the collection liquid and start typing away:
{% unless collection.handle != 'bags' or collection.handle != 'blazers jackets' %}However, you realize quite quickly that while this will work in the interim, as soon as your client gets new stock or adds a new collection, your quick solution will go awry fairly quickly.
The answer? Mixing Liquid with a link list.
The first step to making all of your brand page dreams come true is getting all the collections in order.
You might also like: The Power of Link Lists
Step 1: Create collections
Create all the collections you’ll want to display, and get all the pictures you want to display for said collections in order. (Just like with products, everything looks better when it's the same size.)For me, I'll be building a brand's page so I'll be uploading all the different brand pictures into the collections.
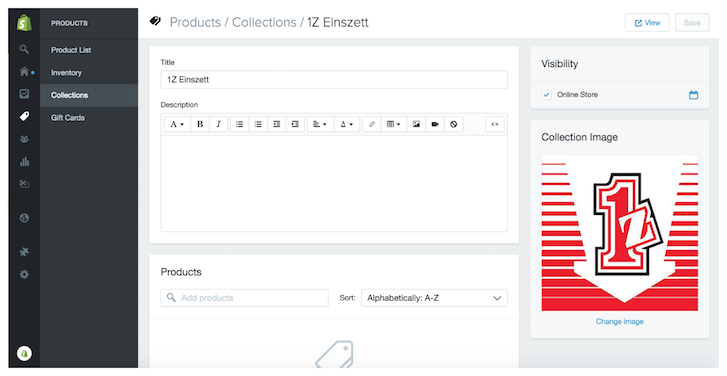
Step 2: Create a link list within the navigation
This is where you (or your client) can order/reorder the soon to be made brands/trends page. I called said link list “brands” just for this example. (But you can call it whatever you like.)

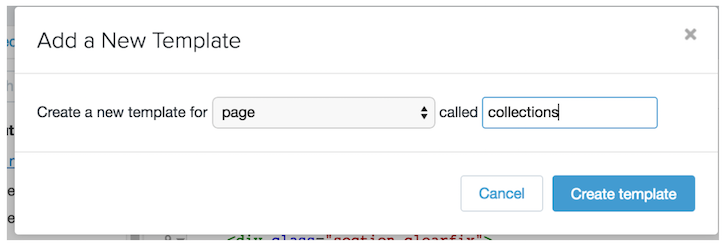
Step 3: Create the page template
Go into the theme editor and click "Edit HTML/CSS."
Next, you need to make a new page template. In this case I called it collections. Presto! You’ve got a new page template.
Step 4: Populate the template
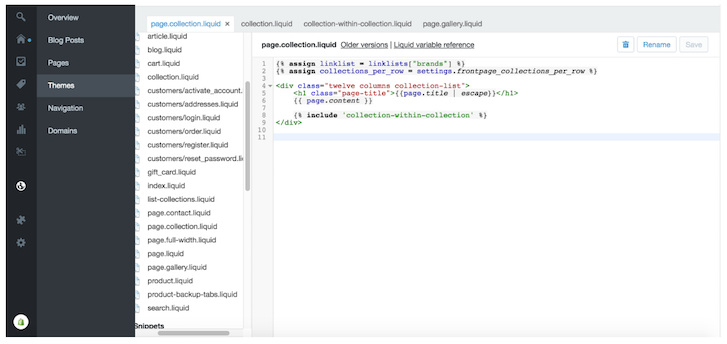
You can view an example of the entire page template here.
You might also like: Using Metafields in Your Shopify Theme
Step 5: Add the collection-within-collection
Now we need to add the elusive collection-within-collection. This is where all the magic happens. Create a new snippet and call it collection-within-collection.
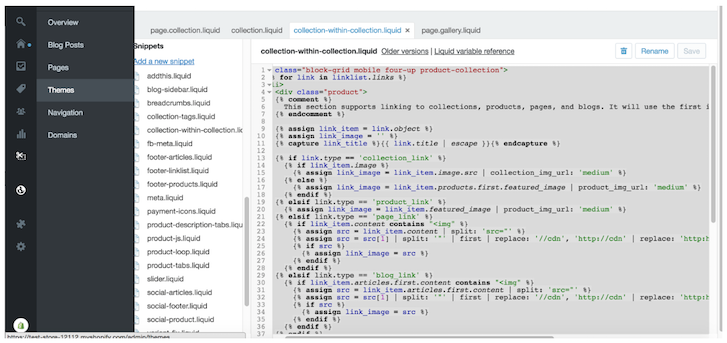
Step 6: Link it all up
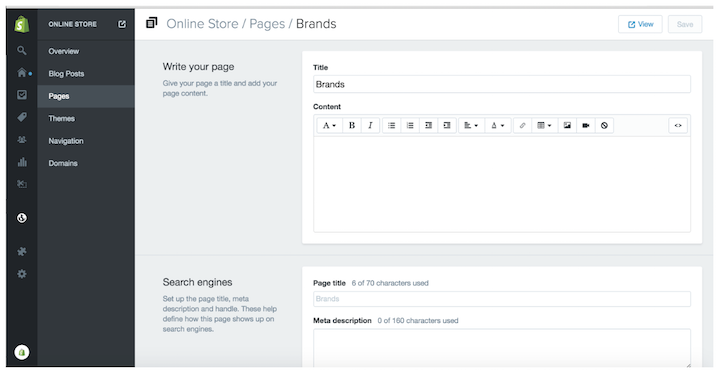
Now all you’ve got to do is create a brand’s page and change the template to page.collection and click save.
Step 7: Admire your handy work
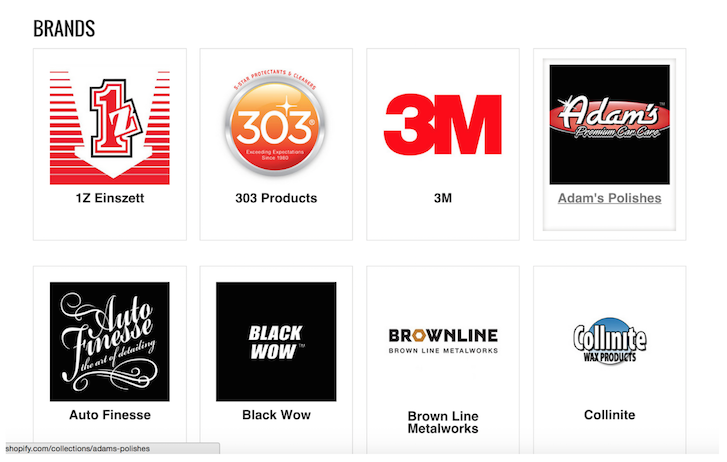
When you click on the collection pictures, they will link to all the products that are housed in said collection! It’s a really powerful tool. The best part is your client can easily switch the order and switch the collections out right from the link list we created (in this case, it’s called "Brands").
Let me know if you have any questions, or if you’ve got some ideas that save you time with Shopify.
And don’t forget to check out my notes on GitHub!
Read more
- Introducing Online Store 2.0: What it Means For Developers
- Building an Accessible Breadcrumb Navigation with Liquid and Shopify
- How to Customize Content by Country with Shopify
- How to Work With Shopify Theme Blocks
- How to Add a Social Media Marketing Icon to Your Theme
- Building Nested Navigations with Shopify Link List
- Your Guide to Ecommerce Microsites: How, When, and Why to Build Them
- How URLs Map to Shopify Templates
- The Power of Alternate Layout Files in Shopify Theme Development
- Creating Useful CSS Hooks in Liquid
You might also like: The Essential List of Resources for Shopify Theme Development

