In order to increase conversions and help merchants make money online, great performance is imperative for an online store. Photos on a website are almost always the largest assets when it comes to the different types of content we serve online. Therefore, if we improve the performance and delivery of the photos we serve to our online users, we likely improve the overall performance of our site.
What is a progressive jpeg?
A progressive JPEG is an image created using a different encoding process to a typical baseline JPEG. Traditionally JPEGs are encoded and decoded from top to bottom, left to right. This is referred to as a baseline encoding. However, a progressive JPEG, is encoded in a different way. When you see a progressive JPEG load, you’ll see a blurry version of the full image, which over time gets sharper as the image is decoded or renders in the browser.


What’s old is new again
For those who are old enough to remember dial up internet, progressive JPEGs were super popular in the 90’s, especially because we were dealing with slow internet connections. The main reason why we would use them today is to improve performance for those on slower connections such as mobile or in rural areas.
You might also like: Using Responsive Images to Decrease Page Loading Times.
Why use progressive JPEGs?
One clear advantage of progressive JPEGs is that there is a perceived performance bump. Users get a preview of what an image will look like before it’s finished downloading. Additionally, the layout and space that image takes up on your site is faster to load, making the whole thing feel quicker. Progressive JPEGs are also typically smaller than non-progressive JPEGs, even though the final image is visually the same.
It’s important to keep in mind that progressive JPEGs take up more CPU time and memory to encode and decode, as the image data is parsed multiple times. So while it does give you a preview faster, the overall time to decode might be close to 2.5 times longer.
img_url filter and format option in Liquid
Using Liquid’s img_url filter, you can pass a format option for images. It looks something like this:
{{ product | img_url: '800x800', format: 'pjpg' }}
Simply pass the format option you want to to the img_url filter and Shopify will let you specify what format you want to render.
You might also like: How to Manipulate Images with the img_url Filter.
Shopify introduces WebP
Just last week, Shopify started to automatically serve WebP images. WebP is a modern image format that provides superior compression for images on the web, with an average saving of over 30 percent in file size over traditional file formats like PNG and JPEG. Smaller images mean faster download times and less network bandwidth usage, which both contribute to pages appearing noticeably faster.

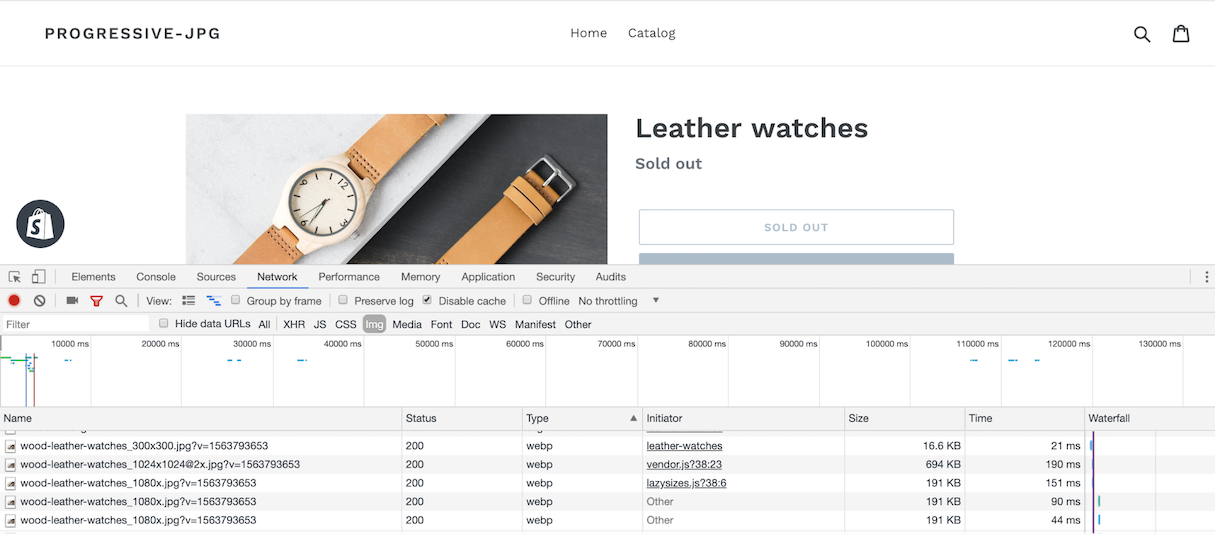
To check if your store is rendering WebP, simply open up the developer console in Chrome, and go to the Network tab. Reload your page, and you should be able to see that the type is set to webp.
What’s great about this improvement is there are no code changes you need to make as a developer. Additionally the support for WebP is already pretty good, and Shopify will fallback to a typical JPEG in browsers that don’t support the format, such as Safari or IE.
So when should I use progressive JPEG vs WebP?
If you’re using an existing theme, taking advantage of the WebP updates in addition to using lazy loading is an ideal way of keeping things fast.
You might also like: How Lazy Loading can Optimize Your Shopify Theme Images.
And if you want to use progressive JPEGs make sure you understand why you want to use them—because there are downsides to them too. I would warn against using progressive JPEG formats for small images like thumbnails, as these tend to actually be larger in file size than regular JPEG images.
Like anything, it’s important to test and see if the changes you make actually reduce time to first meaningful paint or not. In some cases it might actually be better to just take advantage of native WebP formats and lazy loading over using progressive JPEGs. For example, consider the file size difference between a rendered progressive JPEG and WebP. If the progressive JPEG is close (within 10kb to 20kb) or smaller than WebP, and the image is visible on page load, then consider using the progressive JPEG over WebP.
Build better performance
These new image formats make it easier to ensure great performance on your clients’ stores, meaning increased conversions and sales. By understanding the differences between progressive JPEGs and WebP formats, you can help your clients build their businesses.
Read more
- 10 Beautiful Ecommerce Website Color Schemes
- How to Get Published in the Shopify Theme Store
- Introducing Online Store 2.0: What it Means For Developers
- Build Forms on Shopify: How to Use Liquid to Build Robust Forms for Shopify Themes
- How to Use Liquid to Create Custom Landing Page Templates
- Tips for Using Snippets in Your Shopify Theme Work
- Building a Clickable Call-to-Action Button for Your Shopify Theme
- Building Nested Navigations with Shopify Link List
- Tips for an Efficient Shopify Theme Review Process
- How Safe As Milk Grew a Successful Theme Partner Business

